The Blog

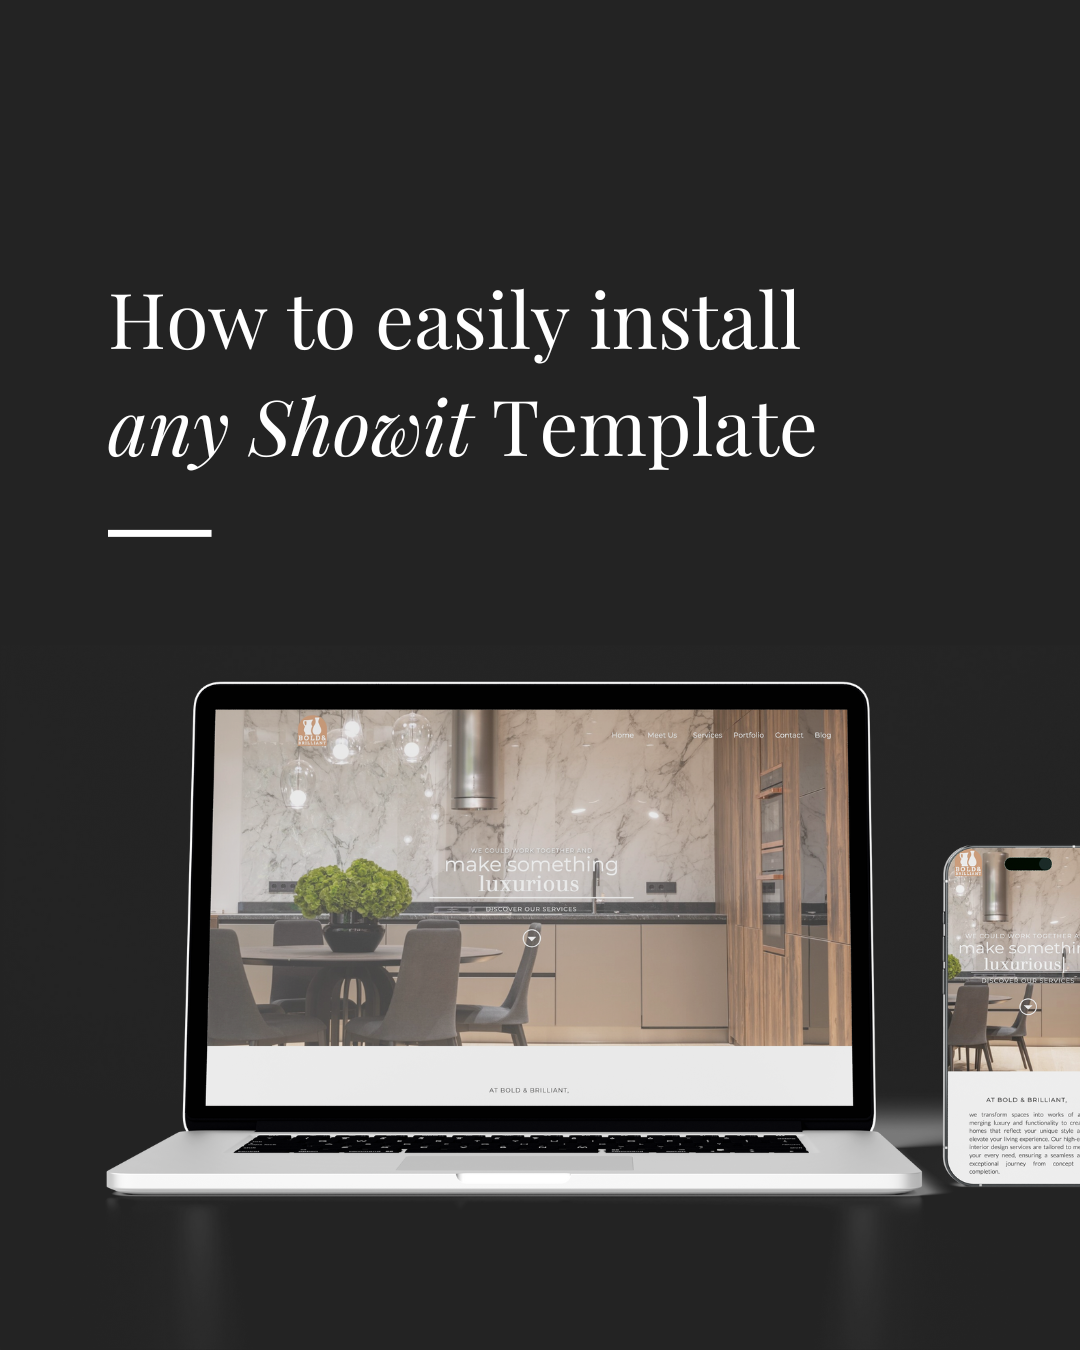
A Comprehensive Guide to Installing Showit Templates
As a Showit website designer experienced in crafting both custom websites and Showit Templates, I often receive inquiries about installing Showit Templates.
When I create custom Showit Websites, I oversee the entire process of setting up and installing the design into the client’s Showit account. This comprehensive service is part of what clients invest in when hiring me.
For the Showit templates available in the Red Lid Showit Template shop, clients are responsible for installing and setting up the template. Nevertheless, I also offer setup and customization services for any of my templates.
If you’re seeking guidance on installing any Showit Template, regardless of whether it’s free, paid, or an add-on, you’ll find helpful information below.
What exactly is Showit?
Showit offers a comprehensive drag-and-drop platform for designing your website, eliminating the necessity of coding altogether.
What is a Showit Template?
A Showit Template comprises pre-designed pages that you can effortlessly install and personalize on your own.
For those familiar with WordPress, the process of installing a template is likely already familiar. Installing Showit Templates follows a similarly straightforward process. With just a few simple steps, anyone can install them.
However, customizing Showit’s templates is far more intuitive compared to customizing a WordPress native template.
What types of Showit templates are accessible?
Numerous types of templates are at your disposal for full customization within Showit’s platform.
You have the option to obtain:
- Any of the Free Showit Templates through Showit’s marketplace (or alternative sources);
- Paid Showit Templates from the Showit Store;
- Premium Showit Templates from other outlets (like Red Lid’s Website Templates Shop)

How do you install a Showit Template?
The sole distinction in installing a Showit template on any Showit account lies in the source from which you acquired or gained access to the template:
- Either from the Showit Store; or
- From any other external platform selling Showit templates, such as Red Lid’s Showit Templates shop, Etsy, Creative Market, or elsewhere.
Free & Paid Templates from the Showit Store
When you select a free or purchase a designer template from the Showit store, the template is automatically integrated into your account.
However, it’s important to note that Showit only accepts a limited number of templates into their marketplace.
As a result, you’ll discover a much broader selection of Showit Templates and Add-on options by exploring external platform selling Showit templates, such as the Red Lid’s Showit Templates shop, Etsy, Creative Market, or elsewhere.
Premium Website Templates, Free and Premium Add-on Showit Templates (including the Red Lid’s Showit Templates shop)
Any Free, Premium, or Add-on Showit Templates acquired from sources outside of the Showit store necessitate a distinct installation procedure.
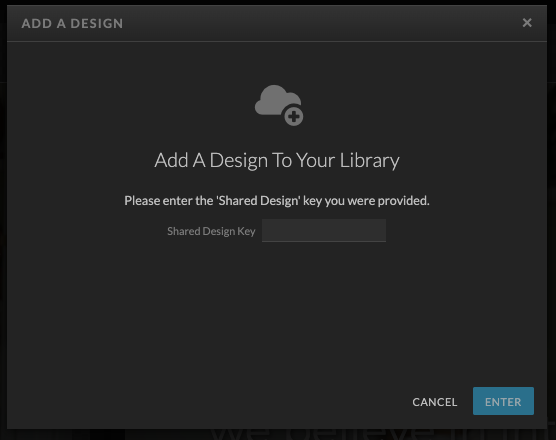
Regardless of the type, all these templates require obtaining a Showit Share Key for installation within your Showit account.
What exactly is a Showit Design Share Key?
The Showit Design Share Key is a unique code, typically a lengthy combination of letters and numbers, which you insert into your account.
When you input the Showit Share Key, you’re essentially importing or adding the free, premium, or add-on template into your Showit account library.
If you’ve bought a Showit template from the Red Lid Showit Templates store, the key will be avaliable upon your purchase via a pdf file.
Using the Showit Share Key to install a Showit Template
Once you’ve obtained the Showit Share Key, proceed with the following steps:
Step 1. Copy the Showit Share Key.
Step 2. Log in to your Showit account and select your name located in the bottom left corner of your browser’s screen.
Step 3. Click on the “Add Design to Library” button.

Step 4. Paste the Shared Design Key into the designated input box, and then click the ‘Enter’ button.
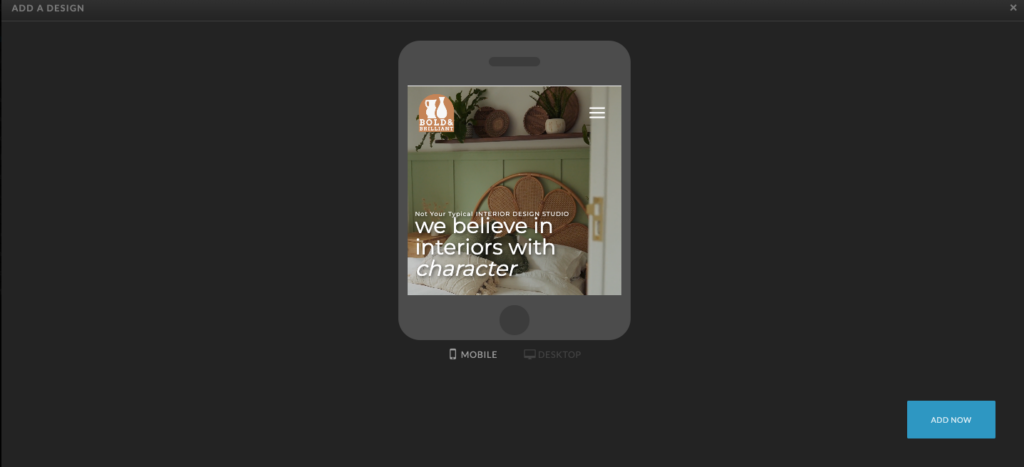
Step 5. Preview the design and add it to your Showit Library by selecting the ‘Add Now’ button.
Step 6. Congratulations! The design is now successfully installed in your account library.

Creating a New Showit Site with a Showit Template
Regardless of the source of your new template, the installation process remains consistent.
To set up a new Showit Website with the installed Showit Template, simply follow these steps:
Step 1. Select your name located in the bottom left corner of your browser’s screen.
Step 2. Choose “Create a New Design.”

Step 3. If you’ve selected a Free Design from the Showit store, you’ll find a list of all available Free Designs under the Showit Designs Tab.

However, if you wish to create a New Showit Site using a Showit Template Design you installed yourself, click on the Your Designs Tab.
Then, select the Showit Template Design you want to use for your new Showit site by clicking on the Design.
Step 4. Preview the Design and begin customizing the new Showit Template you’ve just installed by clicking on the “Start with this Design” button.
Step 5. Showit will then proceed to create your new Site. You’ll see the newly installed site ready for customization!
NOTE: “My Sites” in Showit is where you can access any of the new sites you’ve created.

Whether you’ve built a website from a free, paid, premium Showit Template, or your Showit website Designer has crafted a custom Showit website design exclusively for you (just like I do for my own clients, “My Sites” is the centralized location where all your created Showit sites reside.
For further information or assistance, please don’t hesitate to reach out using Red Lid’s contact form found here.
By Alice Bowyer | February 5th, 2024


Comments will load here
Be the first to comment